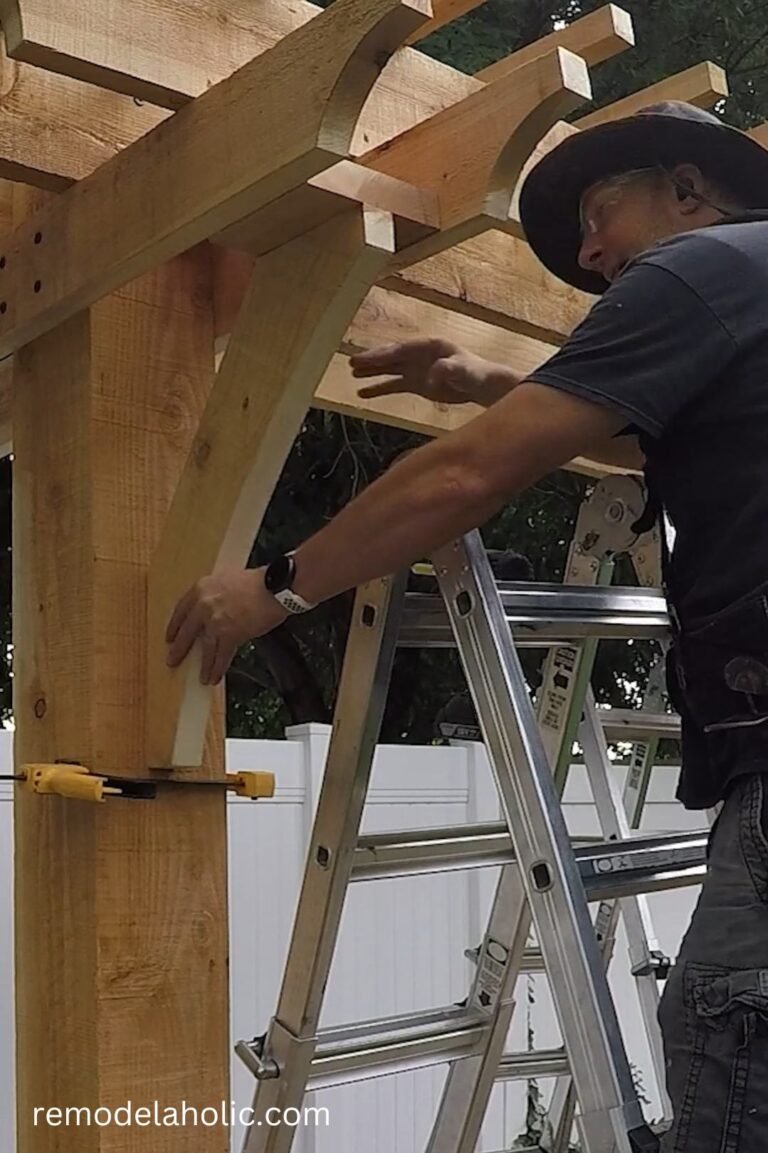
We share a step-by-step as we build a beautiful backyard wooden swing! Here’s Step 11: How to Install Bent Wood Knee Supports to Support the Beam in an Arbor or Pergola.
Follow us on YouTube, Instagram, TikTok, or Facebook to see every step, or sign up here to receive our new blog emails
DIY wooden knee braces
As we explained in the post on how to cut DIY wooden braces, when you’re building an open outdoor structure like an arbor, pergola, or deck, “knee brace” isn’t about your sore knees — it’s parlance about the diagonal supports that help support the structure, from Technical aspect.
Once the wood brackets are cut (and we like to cut that extra curve so they are decorative as well as functional), it is one of the last steps on the structure to give it stability.

Making your own wood brackets allows you to match the wood grains and textures of the wood knee braces to the unique natural colors or combination of wood colors used for the rest of the project’s wood frame. We use cedar, but we often build outdoor projects from redwood as well.
Wooden knee braces look great on open structures, or used as corbels to support porches or awnings, for both visual support and actual structural support. These wooden knee braces on the tree help add support to each end of the beam, and they also add some really beautiful architectural style to your DIY tree swing. We’ve used similar knee supports on our wedding garden tree too, and we love the look!
How to install wood knee braces to support a tree beam
Depending on the application, knee braces can be installed on the face or side of the column. For example:
For the garden wedding tree, the supports are attached using wood screws to the side of the post and the face of the top mesh section, holding the two sections together for easy on-site assembly. On the large wood pergola I built, the knee braces are attached to the side of the post and the bottom of the crossbar using lag screws.
The purpose is to provide corner support (because triangles are strong in construction applications) to help support and reduce stress on right angle connections between columns and beams.


For the tree here, we have a solid column but there are two beams that support it running perpendicularly. The knee brace is centered between the two beam supports (and centered on the post) so we also need to add support between the beam supports to attach the knee brace.
Here’s how I did it:
Measure the distance between the two parallel supports and cut a piece of 2×6 to that length. Center the top side of the knee support and attach it to this shorter support. Drive the screws through the jamb and into the wood bracket to hide them from view. Place the knee brace (with attached support) in place and secure it to hold it level and center of the post. The bottom edge of the support should be level with or slightly higher than the bottom edge of the beam supports. Secure the short supports to the beam supports with screws. These will be visible, so remember to measure and arrange the heads to make them look nice. Predrill, then secure the knee brace in place on the post using a lag bolt. Repeat with the other three wooden knee braces.
Custom carpenters may use a mortise and tenon joint (basically a slot that the dowel on the jamb slides into) in an application like this for extra support and a really nice joint. But for DIYers and contractors like me on projects like this, wood screws and/or lag screws are fine.
Follow us and subscribe to see how we laid the foundations for the tree swing, painted the posts, and more – until the final project is revealed!
Step by step: DIY tree swing
We’ll be sharing step-by-step details as we go, until the beautiful final reveal! Here are all the steps:
Pin this to save and share!


