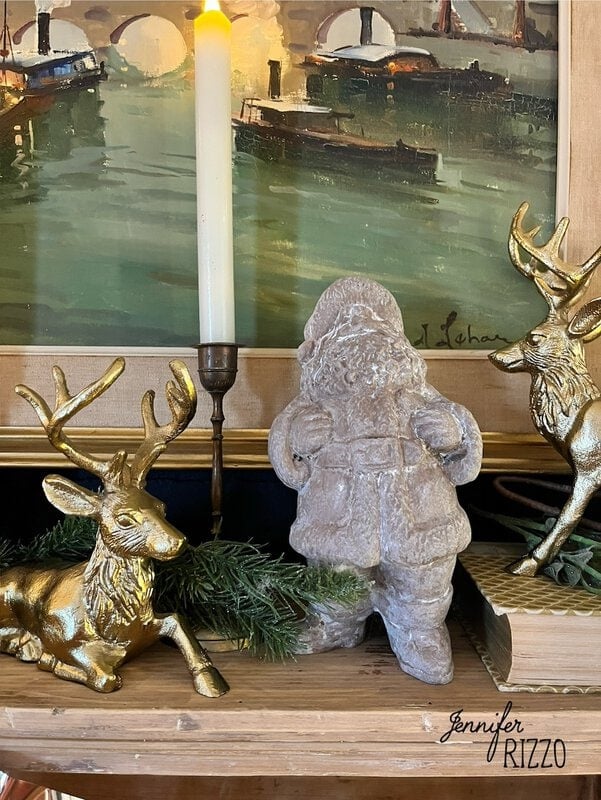
Thrift store Santa gets a whole new look with a little paint magic on this rustic, wood-look Santa. Often times it’s easy to look past these things because they look a bit ugly or outdated. Did you know that you can paint directly on glazed ceramic? This Santa I found seems a bit creepy overall! With a coat or two of paint the craftsman went from oh no! To ho ho ho. It had a great classic Christmas look and just needed a new look to become a rustic, wood-look Santa shop.
Supplies needed to create a rustic wooden look Santa
Chocolate brown craft paint
White craft paint in snow globe
brush
Sealer
Paper towel
As long as the surface is not shiny, you can use regular craft paint. If you’re not sure, use multi-surface paint instead. Use a soft brush to paint the entire surface of the ceramic Santa figurine. Let it dry. It may take up to 3 coats. Let it dry between each coat of paint. This will give Santa a good brown base coat to help give him a rustic wood look. For a different wood look, try different brown primary colors. Using a dark gray undercoat can make it look like stone.
Once the bottom layer of paint is completely dry, mix one part white paint with one part plain water and mix well.
Apply some white paint to a small section of the painted figurine, then work it into the nooks and crannies. Immediately use a paper towel to remove paint from the surface. Complete the entire sculpture and let it dry. Be sure to apply any paint that runs to keep it streak-free.
Once your ceramic Santa is painted, coat it with a matte finish to protect the paint and enjoy the fun decor!
With white paint on the top, it will give it a great rustic look. If you miss a place, it’s easy to go back and touch it up. I designed this alongside the brass reindeer and battery operated candlesticks.
It fits well on the mantelpiece against the old oil painting of the street scene.


