

How to make DIY SLIDING ShOE CUBIES for the clay room!
These sliding shoe storage boxes were an easy solution to one of our problem areas!
We have a great seat in editing and narration in the mud/laundry room with a lot of space, but it lacks a place for us to throw shoes on the way in the door.
It was a spot that closed me since we moved to it:
Some of the mud room updates have started last year and added the Shiplap wall, and there is no tailor and a long pillow. He made a big difference here and I love this half of the room!
The only part that bothered me is the baskets below the bench. I used what we had when we moved, but they pushed me crazy. They threw everywhere and did not carry their shape.
I knew that I would eventually build something to replace it. It is very complicated though … prepare for this elaborate DIY.
I built … square:
This post may have links to your convenience.
You may earn a small commission when a purchase is made through the links.
Ha! Well, two boxes.
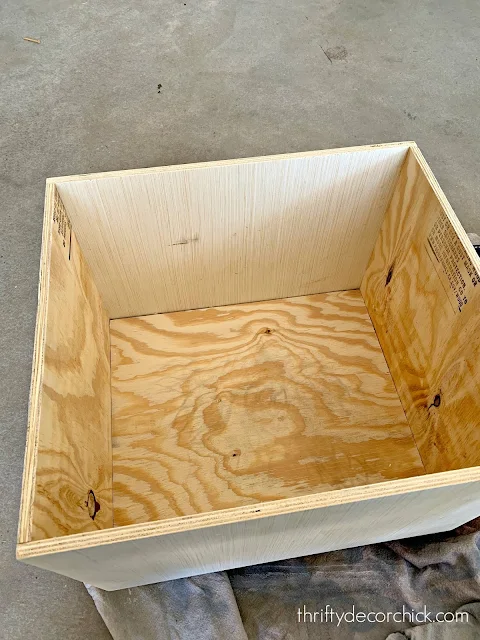
You will notice that I used the inexpensive and low -quality plywood for most of this building – because it carries shoes. Dirty shoes. I don’t need to be beautiful. Prevailing
Once you get the measurements, the building is very easy. It discovers the exact dimensions that take the longest.
I cut my wood in Louis and this made this quickly. My shoe boxes are 14 inches long and 20 inches wide, but of course if you try, you will need to make them suit your area.
I did not use dances or anything – just a lane with my nail gun and is very strong. The bottom piece was placed on the floor, then surrounded with the sides. (You can see how you created it if you look at that image above.)
The front and rear pieces are made on a wider scale (20 inches) to cover the rough edges in the foreground.
I used the first -class piracy for the front panels to draw well. After a few coats put it in place and realized that she certainly needs something small:

It was functional but very boring. Prevailing
Then I added a long and arduous handle to the front of each shoe box … and it was done!

I wanted them to look in a possible place, so instead of the wheels, I put some large towels on the bottom:

They slip and go out easy because our court is very soft. (You have tested it before building it – if you use wheels, remember that you will have to adjust your height of your boxes!)
Initially, I was worried that they will not carry many shoes, because we can shatter a lot in the baskets. It turns out that these are huge and carry a lot!

No, I did not draw the inside. We are the only ones who will see there. Choose your battles, my friends! Prevailing
They turned into better than I imagined! They are very functional, I am very happy with these baskets from here!:

The handles actually work wonderfully, because nine times out of ten use my feet to pull them open and close.  If you are going to do the same, make sure to get long devices for the interface.
So. a lot. Clean. Achieving both shape and function makes me always happy!:

They took me just a few hours – I hope I deal with this road soon.
This will also be a great option to store the bed! You only need to use carpets below it instead of feeling. Prevailing
Here are more details about this room if you are interested:

Do not miss any post by subscribing to e -mail posts.
 Arabic
 Chinese (Simplified)
 Dutch
Dutch English
 French
 German
 Italian
 Portuguese
 Russian
 Spanish